macOS Accessibility Settings
To Open Accessibility Settings
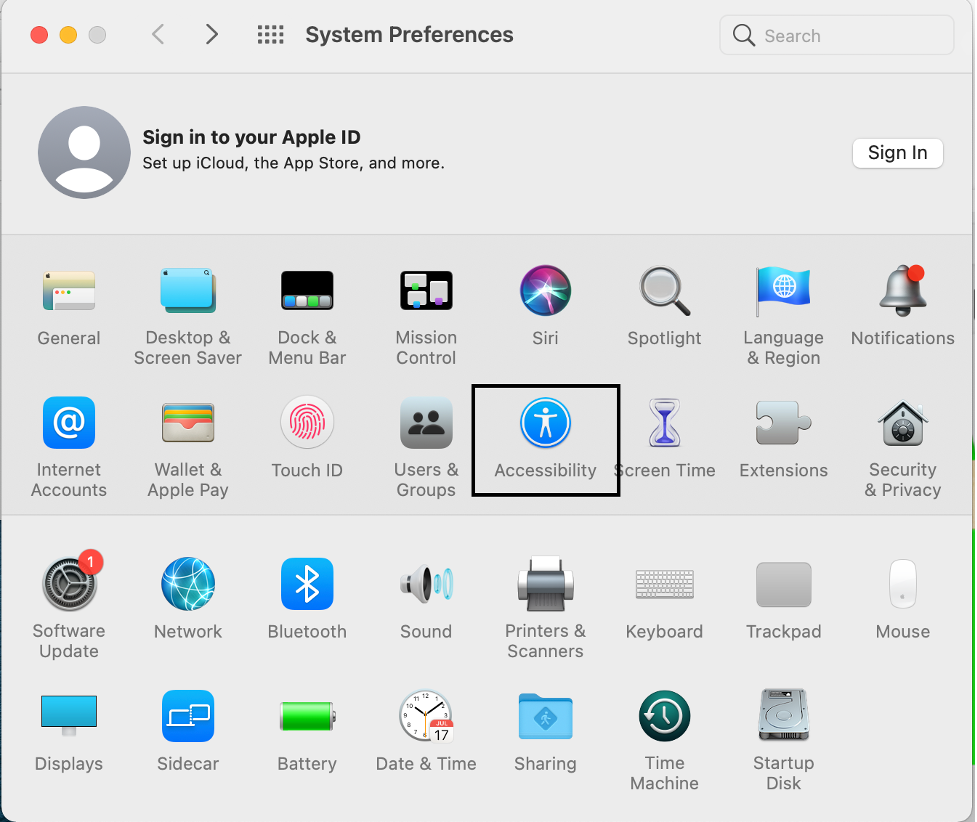
- Go to Apple Menu > System Preferences
- Click the Accessibility Icon
Make Text, Icons and the Pointer Bigger
Make Text Bigger Using Hover Text
- System Preferences > Accessibility > Zoom
- Check Enable Hover Text

Tips & Notes
Hover text works by enlarging the text under the mouse pointer when a modifier key, command by default, is pressed. Text size and font can be adjusted according to preference using the options button.
Make Everything Bigger
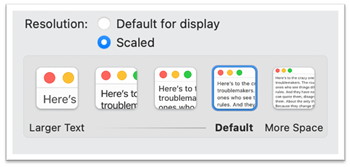
- System Preferences > Displays > Display Tab
- Choose scaled next to Resolution
- Select a scaling using the options provided
Tips & Notes
Display scaling makes everything on the screen look bigger but can make less information available on the screen requiring more scrolling.
Large Mouse Pointer
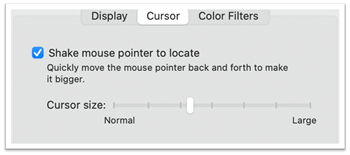
- System Preferences > Accessibility > Display
- Select the Cursor Tab
- Adjust the pointer size slider
Tips & Notes
Optional: check the shake mouse pointer to locate option the find mouse more easily.
Adjust Colors and Contrast
Apply Color Filters
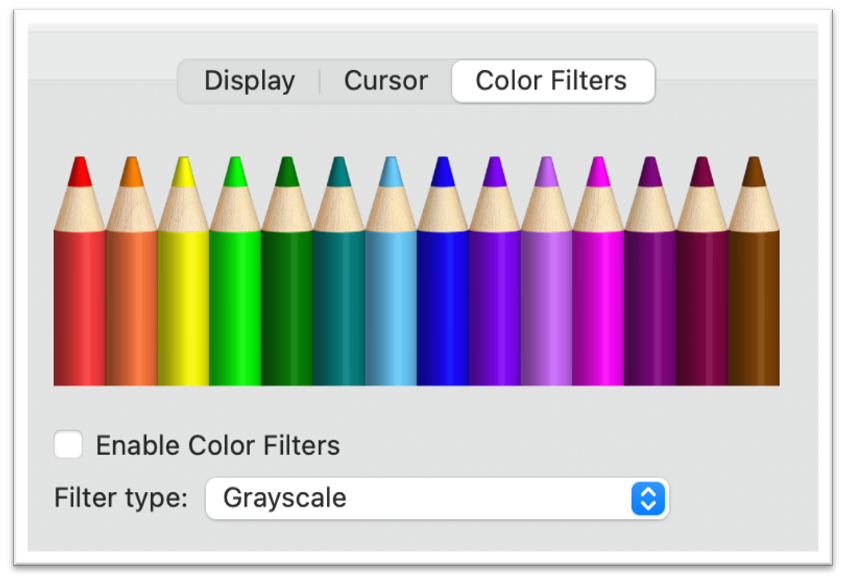
- System Preferences > Accessibility > Display
- Select the Color FiltersTab
- Enable Color Filters and choose a filter type
Tips & Notes
Choose from:
- Grayscale
- Color tint
- Deuteranopia
- Protanopia
- Tritanopia
Enable Dark Mode
- System Preferences > General
- Select an option next to Appearance

Tips & Notes
Dark mode replaces the standard light background & dark text system theme with a dark background light text theme which can make text easier to read for some individuals and may reduce eyestrain.
Use Night Shift
- System Preferences > Displays
- Select the Night Shift Tab
- Schedule sunset to sunrise or create a custom schedule
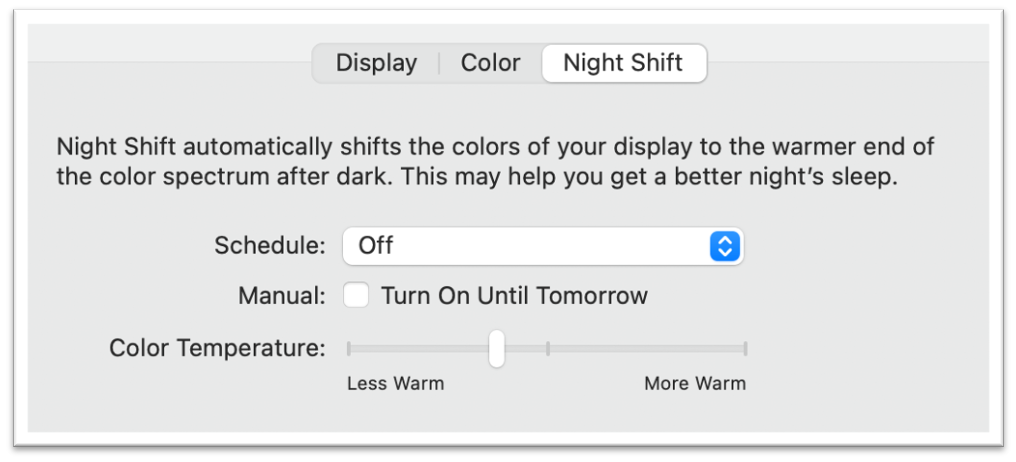
Tips & Notes
Night Light reduces the blue light emitted from the computer screen. Reducing blue light may reduce eye strain when used in dimly lit or dark settings.
Magnify Apps and Text or Use a Screen Reader
Use Zoom to Magnify the Screen
- System Preferences > Accessibility > Zoom
- Choose between Use keyboard shortcut or use the scroll wheel to Zoom
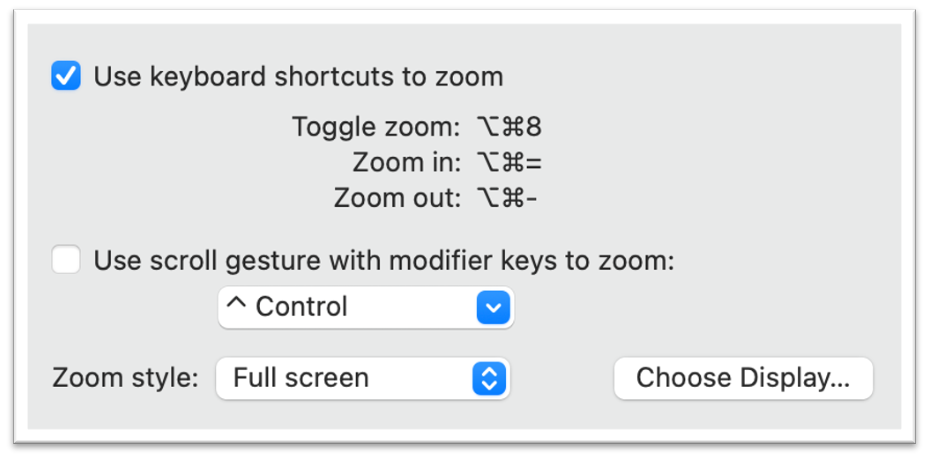
Tips & Notes
Zoom can enlarge the entire screen, or parts of it as needed. Options can be adjusted using the Zoom style selector in the Zoom settings area.
Zoom Apps
One the Web: Command +
In Microsoft Office: Using the Zoom Slider (lower right corner of the window)
Tips & Notes
Use these shortcuts to quickly increase the size of the text in programs such as any web browser or in productivity applications such as Microsoft Word or Outlook.
Use the Built-In Screen Reader
- System Preferences > Accessibility > VoiceOver
- Select Enable VoiceOver

Tips & Notes
VoiceOver is a screen reader designed to support individuals who are blind or who have limited vision.
Audio Adjustment and Captioning
Activate Mono Audio
- System Preferences > Accessibility > Audio
- Select Play stereo as mono

Tips & Notes
Mono audio may improve the listening experience for individuals who have significantly better hearing in one ear by combining the left and right audio channels into one channel.
Adjust How Captions are Presented
- System Preferences > Accessibility > Captions
- Adjust the appearance of the caption text
- Adjust appearance of the caption's background
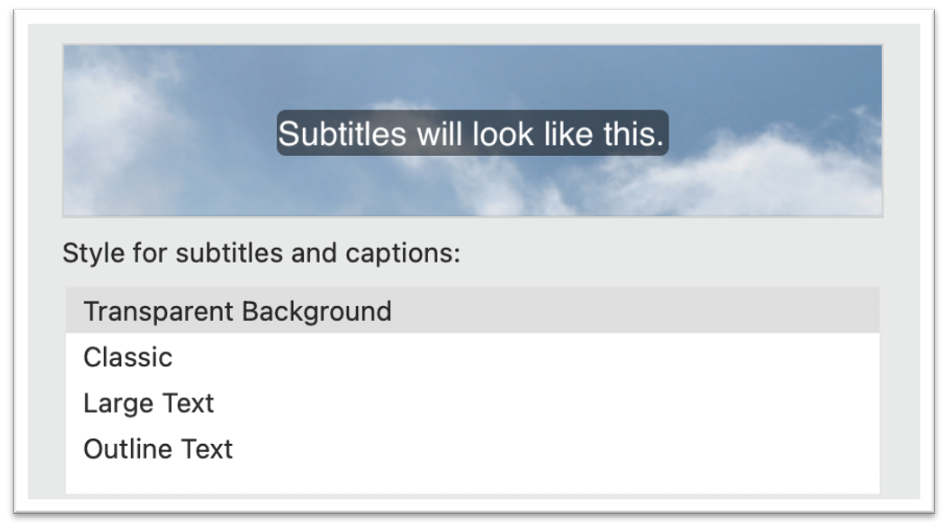
Tips & Notes
The closed captions settings provide several options for displaying captions for individuals who are deaf or hard of hearing. Captions can also be useful for people in noisy environments or who otherwise have difficulty listening. Options include adjusting the color, size, style and presentation of the caption text and its background.
Hands-free Dictation and Voice Control
Turn on Dictation
- System Preferences > Keyboard > Display
- Select the Dictation Tab
- Select Dictation on
Press CTRL twice to use Dictation wherever typing is enabled.
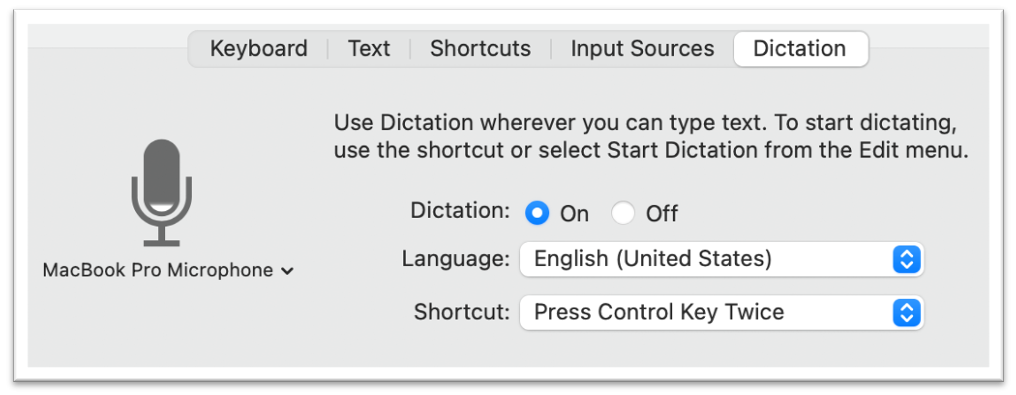
Tips & Notes
The computer must be connected to the internet to use dictation.
Turn on Voice Control
- System Preferences > Accessibility > Voice Control
- Enable Voice Control
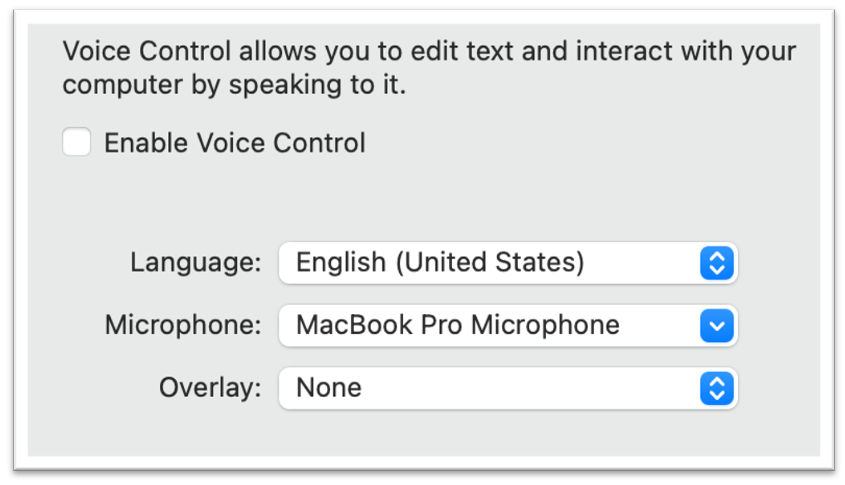
Tips & Notes
Voice control is designed for people who need assistance operating the computer by voice and requires some training to use effectively. Use dictation instead for more limited assistance with typing.
Adaptive Keyboard and Mouse Settings
Activate Sticky Keys
- System Preferences > Accessibility > Keyboard
- Enable Sticky Keys
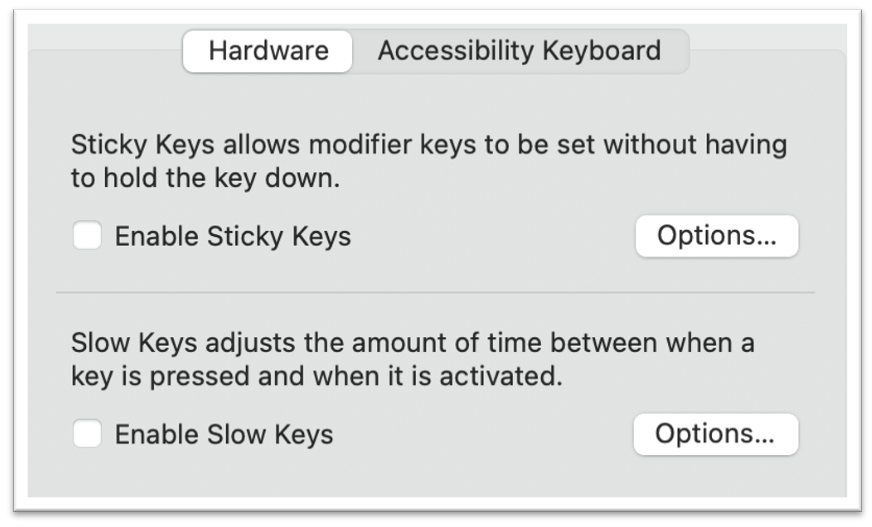
Tips & Notes
Sticky keys is designed to enable one handed activation of multi-key combinations such as Command + P (print) or Command + Tab (switch windows). The feature holds down each system key (Command, Option, Shift or Control) until an alpha-numeric key is pressed.
Turn on Slow Keys
- System Preferences > Accessibility > Keyboard
- Enable Slow Keys

Tips & Notes
Slow Keys can be used to ignore brief or repeated keystrokes and may be useful for people who have difficulty targeting keys or who have tremor in their hands. The feature includes three settings which can be individually adjusted: Slow Keys: tells the keyboard to wait before accepting more keystrokes to avoid inadvertent key presses.
Use the Accessibility Keyboard
- System Preferences > Accessibility > Keyboard
- Select Enable accessibility keyboard
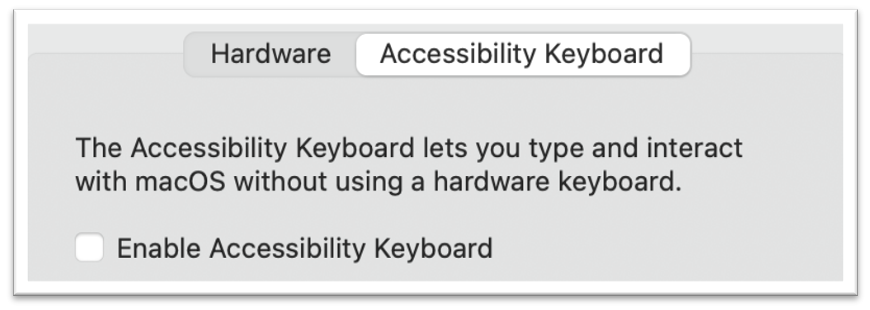
Tips & Notes
The on-screen keyboard may be an alternative to the hardware keyboard for individuals who have limited or no use of their hands because it can be controlled using external ability switches, adaptive pointing devices such as head pointing or using eye gaze.
Control the Mouse with the Keyboard
- System Preferences > Accessibility > Pointer Control
- Enable Mouse Keys
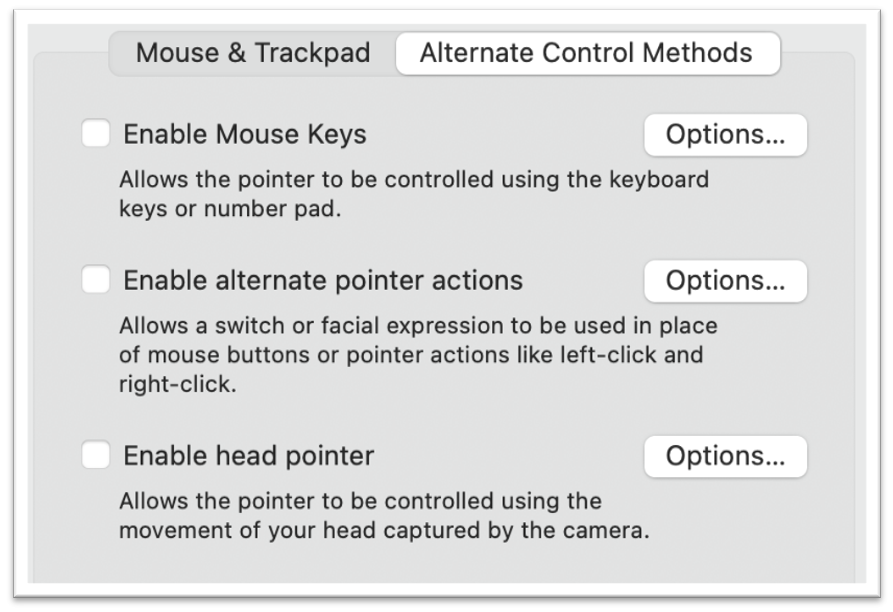
Tips & Notes
Allows control of the mouse using the numeric keypad on the hardware keyboard.
Use Facial Gestures or Switches Instead of Mouse Buttons
- System Preferences > Accessibility > Pointer Control
- Enable Alternate pointer actions

Tips & Notes
Alternate pointer actions allows a switch or facial expression to be used in place of mouse buttons for pointer actions like left -click and right-click.
Control the Mouse with Head Movements
- System Preferences > Accessibility > Pointer Control
- Enable head pointer

Tips & Notes
Allows control of the mouse using head movements captured by the computer's camera.
Support Focus, Reading and Writing
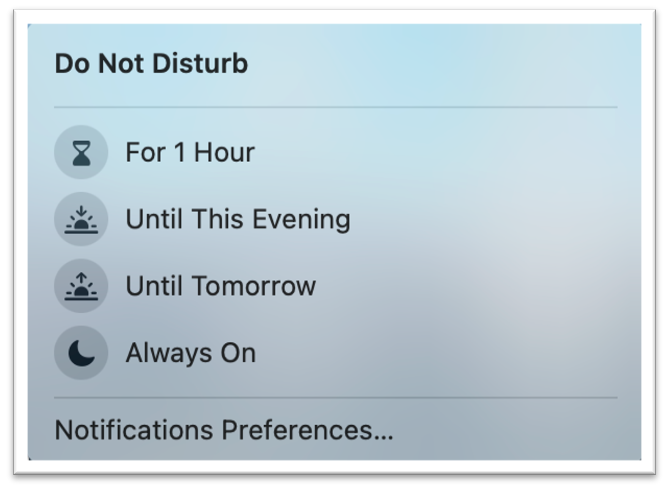
Configure Do Not Disturb
- Control Center > Do Not Disturb
- Select a duration
Tips & Notes
Do Not Disturb silences most notification sounds and pop-up alerts.
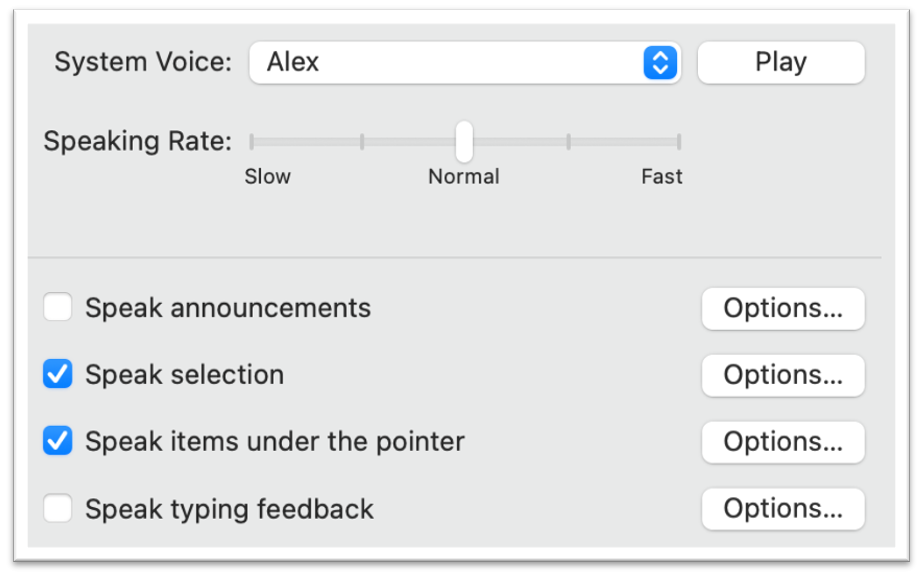
Use Spoken Content
- System Preferences > Accessibility > Spoken Content
- Select Speak Selection
- Select Speak items under the cursor
Tips & Notes
The spoken content feature offers several options including:
- Speak announcements such notifications and alerts.
- Speak Selection which speak selected text when option + esc is pressed (default)
- Speak items under the pointer which speaks text under the mouse pointer as it moves around the screen.
- Speak typing feedback which speak characters or words as they are typed.
Center for Inclusive Design and Engineering (CIDE)
CU Denver
The Hub, Bioengineering
1224 5th Street
Suite 130
Denver, CO 80204
303-315-1280
Sponsored Programs
Engage with Our Center
Need Assistance?
CMS Login


