Reminder: Web Accessibility Compliance Law in effect
Learn how to meet accessibility standardsLocal Footers in Sitefinity
The local footer is located right above the global footer, which is the same university-wide. The local footer can be customized by site builders. It can consist of a parent breadcrumb, a physical address, social media icons, and up to four columns of helpful links for site visitors. The following is an example of a local footer for the Office of Information Technology (visit the site to see this footer live):

Local footer properties
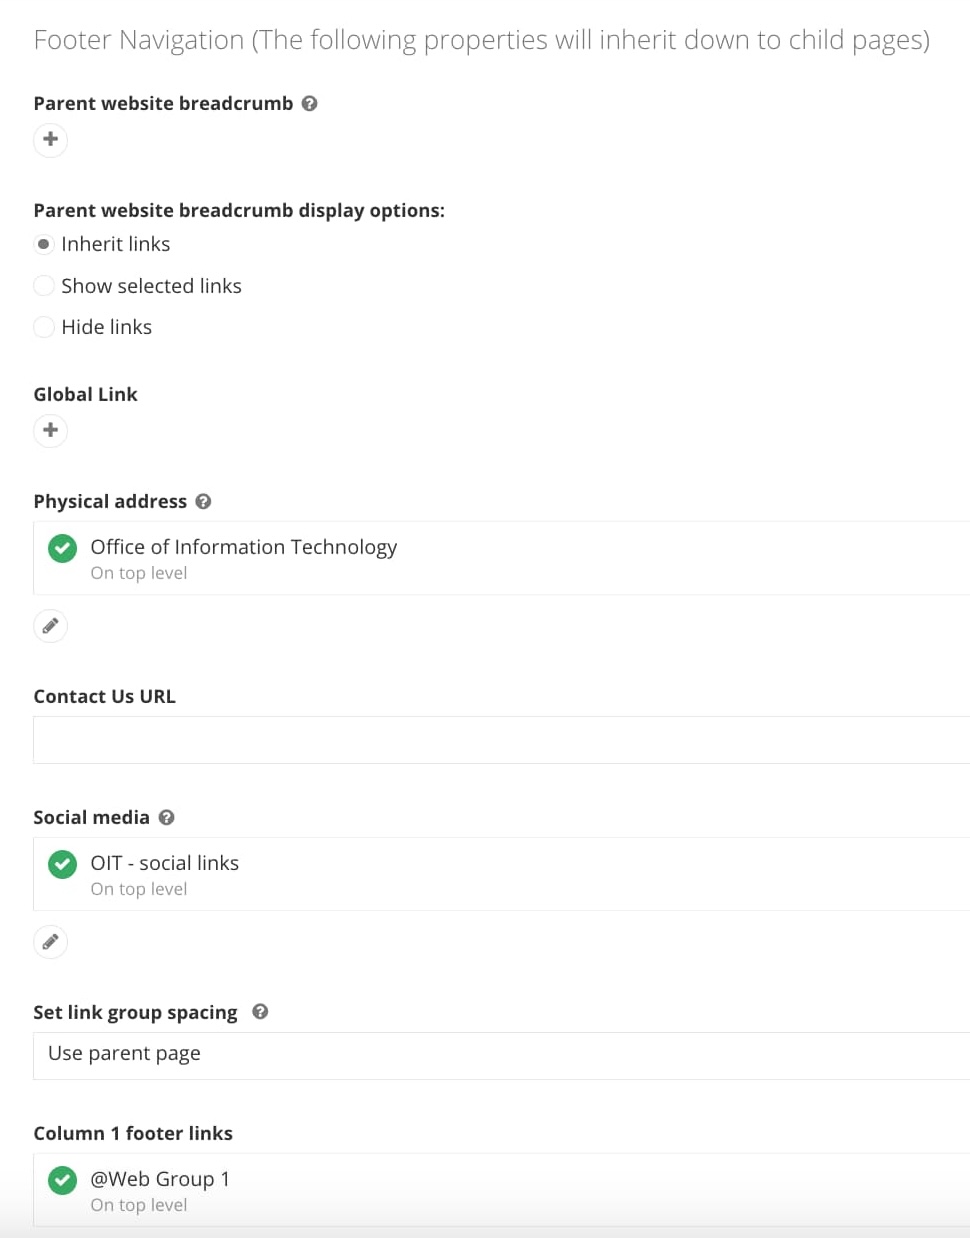
Local footer properties are maintained in page properties and are inherited throughout the site. For this reason, each top-level page should have the appropriate local footer properties setup so that each child page can inherit those properties. This inheritance should remain consistent throughout the entire site but can be broken in special circumstances on a page level. When creating or editing a page, you can customize your local footer beginning with "Parent website breadcrumb" and ending with the selection of your site's columns.
- To edit local footer properties, go to the Pages tab in Sitefinity.
- Open the Actions menu to the right of the page you'd like to edit.
- Select Title & Properties.
- Scroll to the Footer Navigation section and make edits as needed.
- Save changes.

Local footer options
Parent website breadcrumb: Select the parent website if you would like one displayed in the footer. For example, the Department of Surgery site might choose to have a breadcrumb link to the main School of Medicine homepage.
Physical address: Select the department/office address. Please submit a ticket if the address information is not available or correct.
Social media: Social media icons can be displayed in the local footer. This is a reusable content type and should only need to be created once. You can create the content type in this area by clicking Select and “Create a new item”. You can also create and manage social media links in the Content tab.
Set link group spacing: When there are 3 or more link groups in the footer, you can change the width of each link group to be equally spaced. By default, link group widths automatically adjust to the width of the content in the link group.
Local footer links (column footer links): You can select up to four link groups to show in the local footer. If you've already created link groups, you can select them here and make edits.
To create a link group, click Select and “Create a new item”. However, you won't be able to add individual links to the new link group in Title & Properties. The instructions below for Creating link groups provide details on how to add links to a new link group from the Content tab.
Creating link groups
Link groups are columns containing helpful links that are located in the local footer of a site. The following instructions detail how to set up link groups in the Content tab:
- Open the Content tab at the top of the Sitefinity dashboard and select “Link Groups”.
- Select the “Create a Link Group” button.

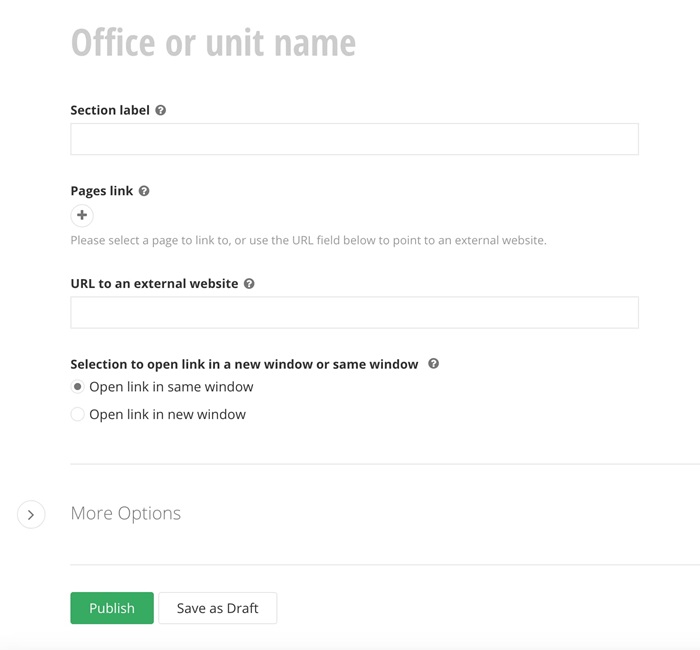
- Enter the office or unit name. Remember to number the name if you will have multiple columns.
- For example: OIT wants to have 3 link columns in their local footer. Therefore, three link groups should be created, one for each column. The “office/unit name” for those groups might be OIT 1, OIT 2, and OIT 3. These names are not public; they are intended to help you organize link columns.
- Next, provide a section label. This is the public label that appears above the links in the local footer. Site visitors can see this label and it should be descriptive of the links in this group.
- For example: resources, services, etc.
- Add a pages link if you want the section label to be clickable and direct site visitors to an associated page.
- If applicable, choose whether you would like the pages link to open in a new window or the same window.
- Publish the group.
- Next, select the new link group you created so that you can add links to the group.
- Select the “Create a Link” button.

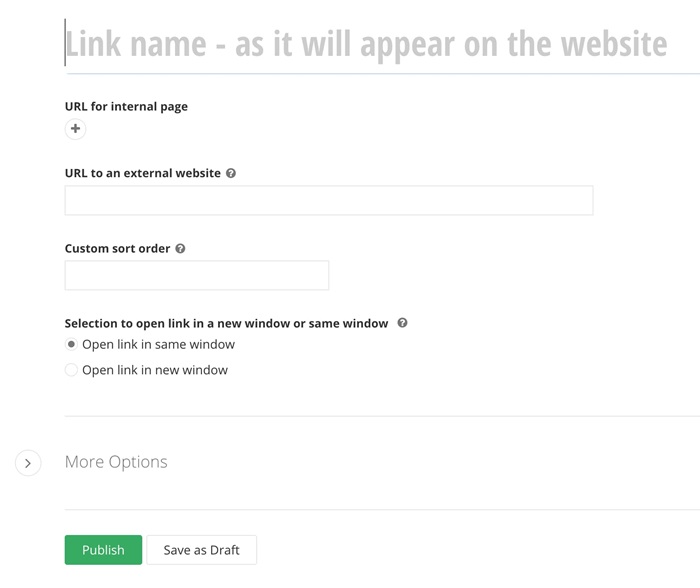
- Add a name for the link (as it will appear on the website) and either select an internal page to link or enter an external page URL.
- Number the link to create a sort/display order.
- Publish.
- Repeat until you have all created all your link groups and links.
Editing link groups
To make edits to existing footer link groups:- Open the Content tab at the top of the Sitefinity dashboard.
- Select “Link Groups”.
- You should now see the links groups for your site.
- Select a link group to make edits to the links in that group.